If you’re new to TradingView, the sheer number of options can feel overwhelming.
Charts, indicators, drawing tools, alerts, layouts — it’s easy to get lost.
This guide isn’t about showing you every single button.
It’s about getting your premium setup running fast, using the features that actually make a difference for real trading, and avoiding free tools that won’t generate results or help your trading workflow.
If you want to start with the setup I use (and includes the premium tools), here’s the link:
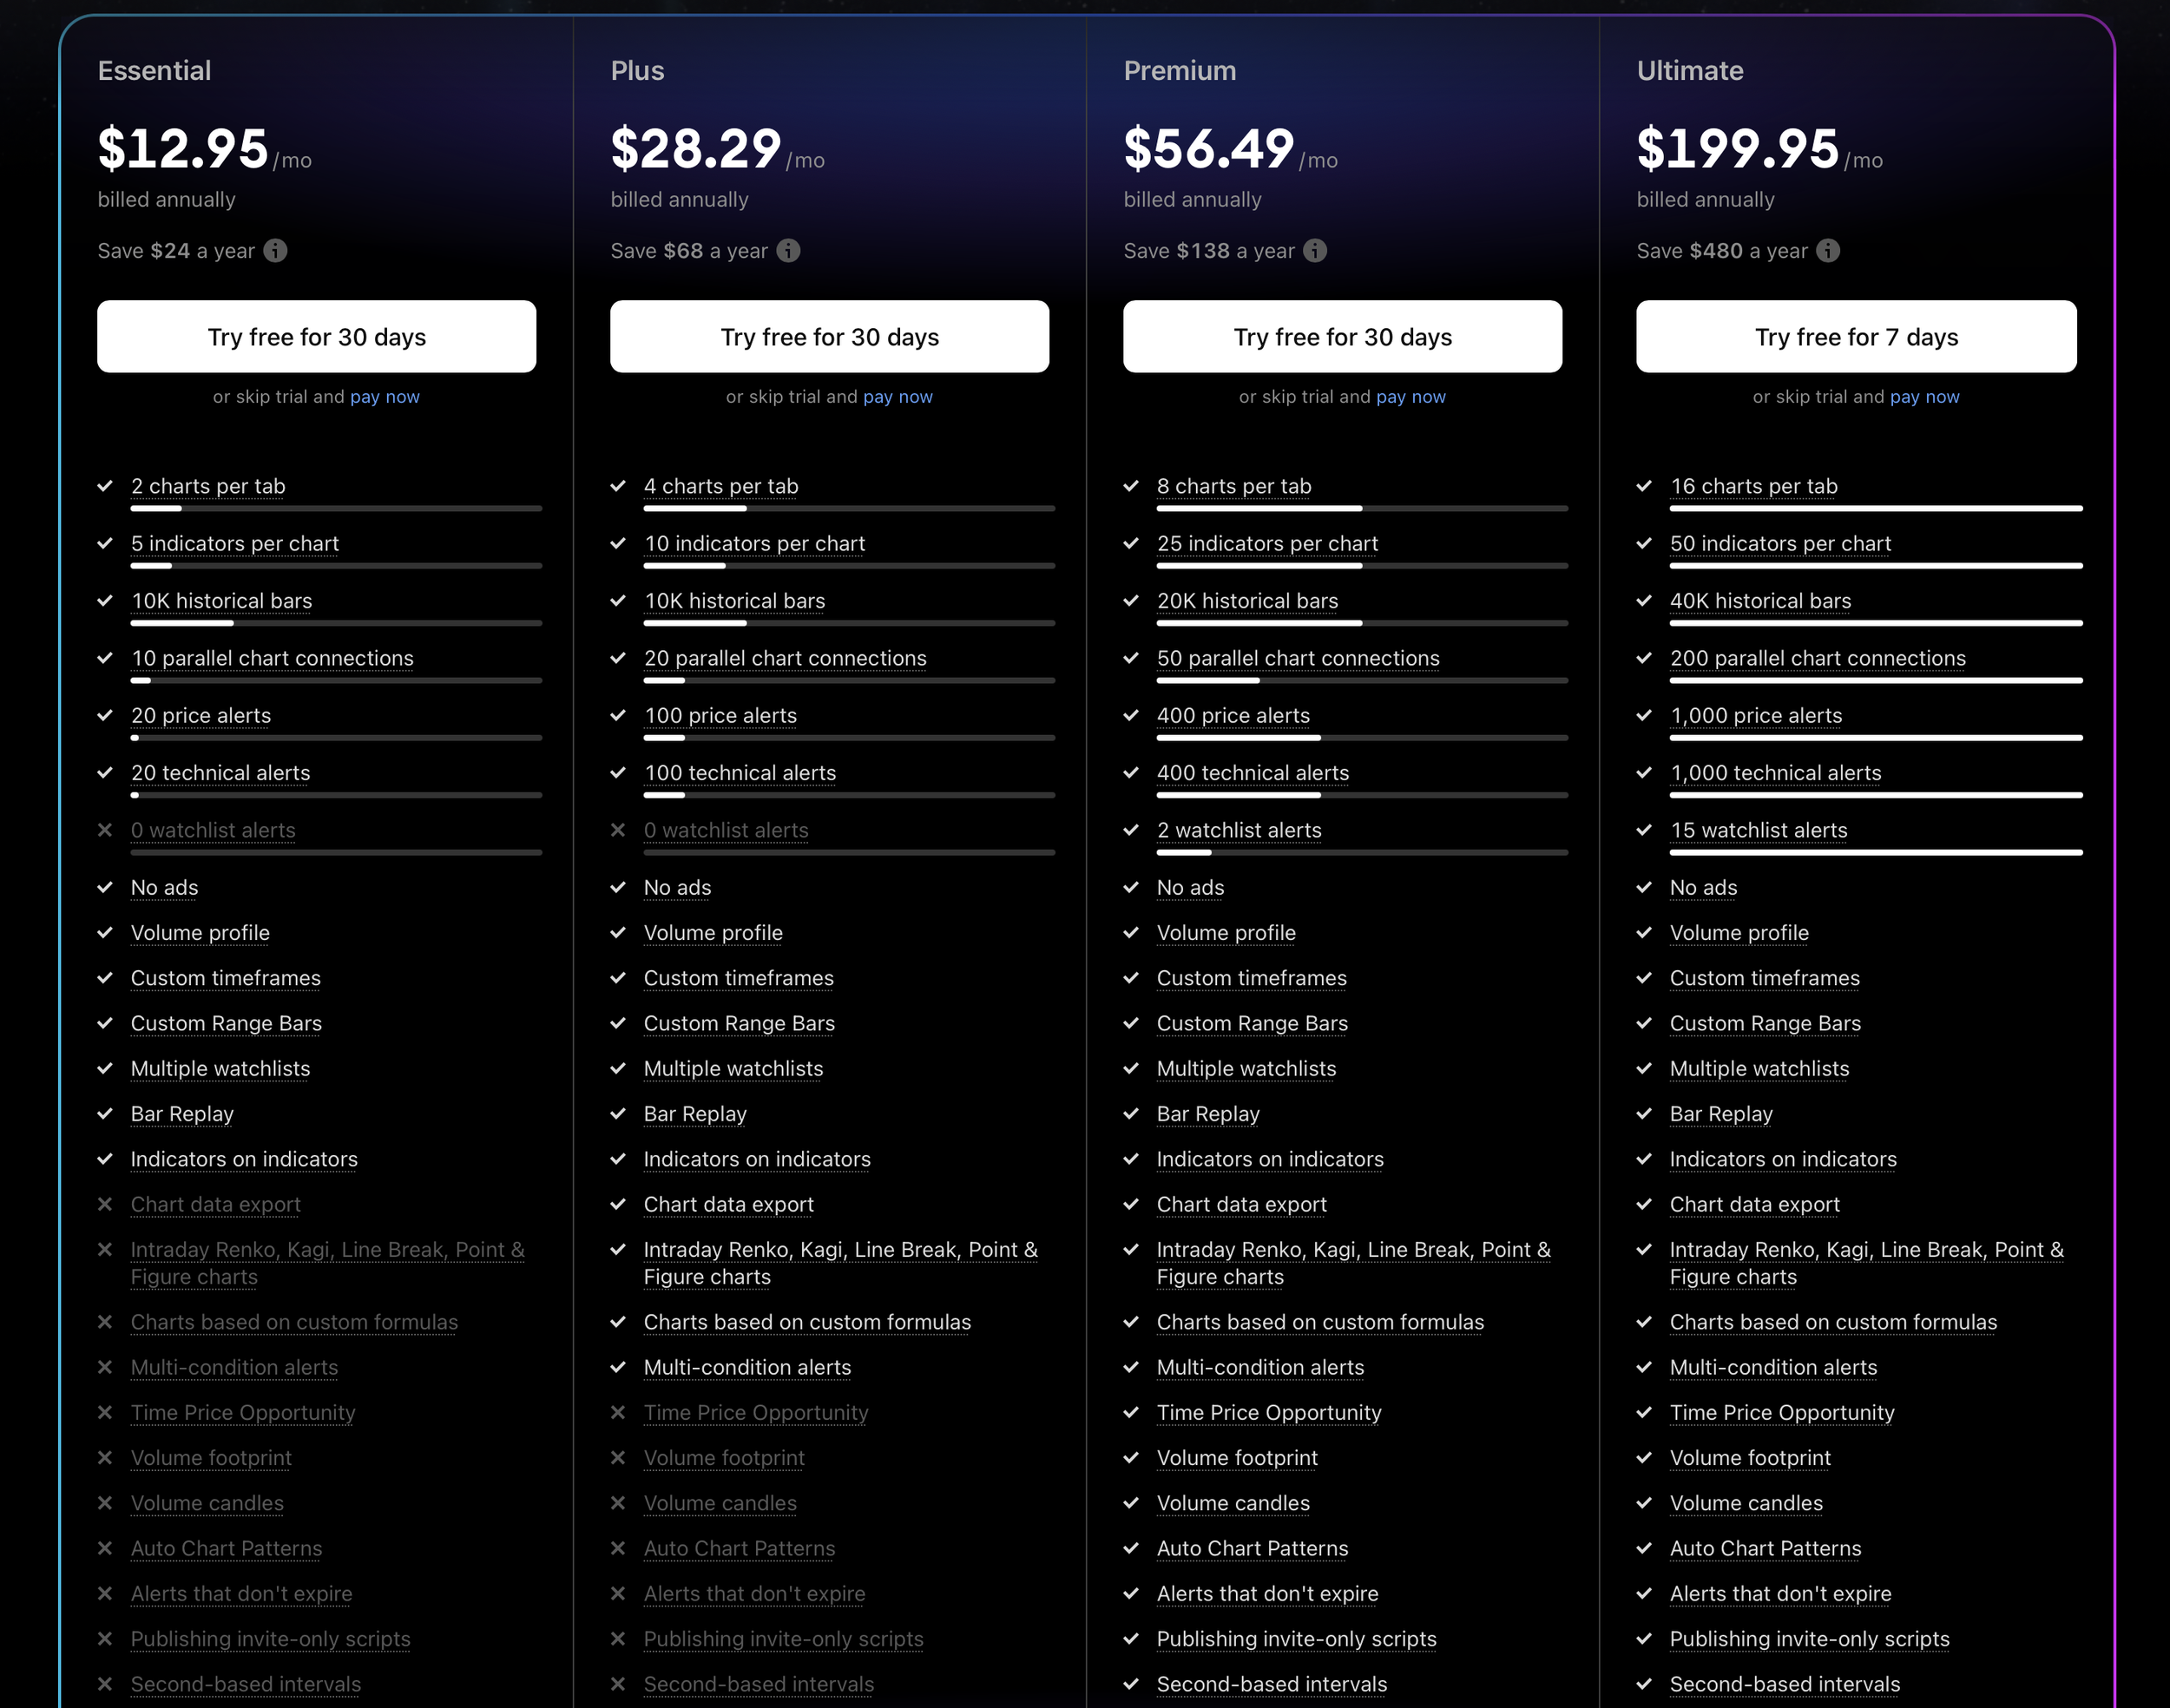
Step 1: Choose the Right Plan
TradingView offers multiple plans:
Essential – Basic charts, limited indicators, 20 alerts.
Plus – 4 charts per layout, 100 alerts, extra indicators.
Premium – 8 charts per layout, 400 alerts, intraday indicators.
Ultimate – All features unlocked, 16 charts per layout, 1,000 alerts, priority support.
For a beginner who wants real trading results, Pro or Pro+ gives the best balance:
Multiple alerts so you don’t miss trades
More indicators to analyze structure
Ability to use bar replay for practice
Free works for testing, but you won’t experience the workflow that actually helps you make better trades — and that’s what converts.
Step 2: Set Up Your Chart Layout
Your workspace should reduce decision fatigue. Here’s what I recommend:
Primary chart: 5-minute (for intraday setups)
Secondary chart: 15-minute or 1-hour (to check trend)
Optional chart: Daily or weekly (for context)
TradingView lets you save layouts and access them anywhere — a paid feature that makes consistency easy.
Tip: Give each layout a clear name (e.g., “Day Trading Setup”) so switching is simple.
Step 3: Add Essential Paid Indicators
Beginner traders often overload charts with free indicators that don’t help. Focus on:
Volume Profile Fixed Range (Pro feature) – Identify high-volume zones that price reacts to.
Bar Replay (Pro feature) – Practice trades on historical candles.
Multiple EMA and VWAP Overlays (Pro/Pro+ feature) – Helps visualize trend and support/resistance.
Free indicators like simple moving averages exist, but these premium tools save time and improve decision-making.
Step 4: Set Up Alerts
One of the biggest advantages of upgrading is alert functionality.
You can create alerts for:
Indicator conditions
Price hitting specific zones
Crosses on trendlines or EMAs
Instead of staring at charts all day, TradingView notifies you when a potential trade is actionable.
This is where you start to see the value of paid plans.
Step 5: Organize Watchlists & Notes
Beginner traders often track too many symbols or forget why a stock or crypto is on their radar.
Watchlists: Separate assets by sector, volatility, or strategy.
Notes: Add short reminders like “breakout resistance” or “volume spike yesterday.”
This setup keeps your trading systematic instead of reactive.
Step 6: Practice With Bar Replay
Before risking real money, practice on historical candles using Bar Replay.
It teaches timing, entry, and exit strategy — without wasting capital.
This tool is only available on paid plans and is a huge differentiator for serious traders.
Step 7: Save and Duplicate Layouts
Once your setup is complete:
Save your layout as “Default”
Duplicate it for variations (e.g., breakout trading, trend following)
Paid plans allow unlimited layouts, so you can experiment without overwriting your main setup.
Why This Blueprint Works
By focusing on paid features that directly impact your trading results:
You spend less time guessing
You catch more opportunities
You build a repeatable routine
All without cluttering your charts with tools you don’t need.
If you want to skip the free limitations and get started with this setup today: